Trail Cameras can be amazing tools, but using trail cameras effectively for mule deer can be frustrating, they can be effective tools in gaining more insight into the movements and habits of mule deer.
I find trail cameras to be beneficial, mostly because they provide more information on what deer are in the area, and the potential for that area during hunting season. Mule deer bucks still provide plenty of frustration when trying to photograph them, and I don't consider trail camera placement an alternative to regular old "boots on the ground" scouting. In fact, I've scouted bucks and tried to pattern them, then placed cameras, and not taken a single photo of those deer for entire seasons. And in many cases I'll only get one photo or series of photos of a buck and never have him pass a camera again.


 Stealth Cam also makes some great cameraslike the G45 NG Pro, G30 or the new 4K model: DS4K.


The Benefits of Using Cameras for Mule Deer:
Trail cameras can provide great information on deer movement when you can't physically be in the area, especially if bucks are being photographed regularly.- Trail cameras are a great way to find new bucks that are in your area. As mentioned, sometimes you'll only get 1 photo of a buck, but having him on camera is valuable because you can assume he's in the general area and could show up anytime.
- Show deer movement at night. Deer move all night long, and I haven't found optics good enough to see in the dark (yet). Cameras provide insight on nighttime behavior and movement direction. Having multiple cameras on certain movement corridors can provide even more information. Nighttime movement is frustrating and some bucks never show up in the day. It's a two edged sword - great to know they are there, but frustrating when you can never see them during daylight hours or during your hunt.
- Trail Cameras allow you to keep tabs on deer year after year. Cameras are a great way to find out if your bucks have been killed during the winter or during the last hunting season. Having photos year after year, also provides awesome information about antler growth, year-to-year behavior, and general growth/herd information.
- Provides perspective and potential. While it can be frustrating when you aren't seeing the bucks in person that you are seeing on your cameras, it also provides perspective and knowledge of the deer and age class of bucks that are in your hunting area. Push through the slow times, you never know when the buck will show himself.
Cautions of using Cameras:
In a few cases, I recommend not using a trail camera. Checking and placing cams adds pressure to an area. If you're placing cameras in bedding or core areas that a big buck is using and you bump him, it could result in changed patterns, or he may leave the area. Choose your camera locations carefully, and only approach them during times of the day when you DON'T expect the deer to be close by. I suggest getting in and out quickly. I suggest using a SD card reader that is compatible with your cell phone, or bring an extra SD card. Card readers are lightweight, easy, and fun - because you can immediately look at the photos from your camera. Either swap your cards, or quickly look over/transfer the images you want, then leave. The more time you spend by the camera, the more sign and scent you will leave, which can affect deer behavior. Deer seem to have a 6th sense with cameras. Even cams that have no blinking lights or audible shutter or other noises are still detected by animals. I'm not sure if they smell them, or just see them, but they seem aware of the camera, and I in some cases, can affect deer movement.
Trail Camera Placement for Mule Deer:
I've set cameras on heavily used trails I've seen deer use, and water sources with limited success. Most bucks are pretty unpredictable as far as what trails or water sources they're using. I've found the most success by placing trail cameras on pinch points. When I refer to Pinch Points, I'm talking about areas on the mountain that (usually due to topography) force deer to move through a specific area. Sometimes this can be a saddle or a band of cliffs, or narrow ridge. Sometimes it's not that the deer can't go another way, but they choose not to because it's more difficult. Sometimes you'll have a heavy trail in a pinch point and these areas are great for getting a lot of photos. Some of the best success I've had by first, watching deer movements, learning behaviors in a certain area, and then placing cameras in areas where I consistently see deer movement. As mentioned in the articles I wrote: Hunting High Country Mule Deer - Part 1: The Search. I've had this happen on several occasions where I thought I had the perfect place to set a camera, but never got a photo of the buck I wanted. I found a buck a couple of summers back while scouting with my brother. This buck was a beautiful typical with a couple of outside cheaters. We watched this buck feed and bed only a few yards above a trail. This trail went up and over a saddle, and into a patch of timber that looked like the most likely bedding area. The trail split a few yards from entering the trees, and there was a perfect little pine tree for a trail camera. We set the camera and thought we'd come back to photos of this big buck. Three weeks later, we had photos of some deer, and some other smaller bucks, but the big buck never walked past the camera. Looking back on this camera placement, the only thing that makes sense is that there was nothing to push the deer to walk on this trail. Other deer did, but big bucks like to walk the trail less traveled and he was likely bedding somewhere else, or moving across the ridge higher. This camera gave me no intel on the buck, otherwise I might have a better idea of where he was moving. On other occasions I have placed cameras in pinch points, and even after several early morning and evening scouting trips, bucks that I have never seen will show on the cameras.
Settings:
Camera Settings can be an important decision as well. When using photo mode, I typically will use a 3 shot burst with at least a 15 second delay. I may miss some deer, but I think with any setting you'll miss some photo opportunities due to delay settings, or other deer hogging the spotlight. I am a big fan of video mode and suggest you use cameras that have that capability. Some cameras have the technology to capture stills and videos simultaneously. Regardless, video mode is great, and I've switched to using that because none of my current cameras can take both at once. I set my video settings to 10 to 15 seconds with a 15 second delay. I find that I get much better results and fewer partial shots where there's only one antler in the frame, or just an eyeball. Here's an example - if this camera had been on photo mode, I likely would have got 3 quick shots of part of the right antler. Having a video recording allowed this buck to walk into the frame and see his entire headgear. [video width="1920" height="1080" mp4="https://altitudeoutdoors.com/wp-content/uploads/2017/11/IMG_0012.mp4"][/video]Trail Camera Suggestions:
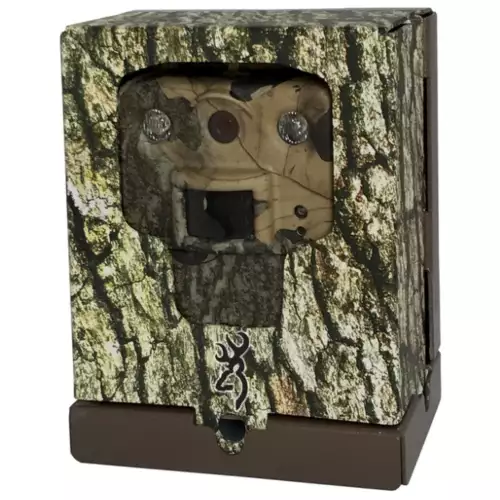
My favorite cameras on the market right now, (bang for your buck) are the browning cameras. I use both their entry level Command Ops, Recon Force and the Browning Strike Force HD. These cameras provide great value and I find browning cameras to capture very crisp and clear imagery, even at night with movement. They are easy to set up and have good battery life, and will support SD cards up to 32GB. We like these cameras so much that we carry them here on our gear shop! My recommendation would be the Strike Force HD due to the smaller form factor and every feature you need! [products ids=3798,3289] I have also used (and like) the Bushnell Trophy Cams and like them. The Trophy Cam HD features simultaneous video and still capture which is a great feature!


: invalid url input -->)


Leave a comment