
I truly enjoy building my own arrows. It makes for a very enjoyable afternoon sitting at the dining room table and building up a batch of arrows while listening to some great music. Not only do I take great pride in the fact that I can say I built them myself, but it also gives me 100% control over the finished product.
Unfortunately, it seems that a lot of archers are hesitant when it comes to building their own arrows. Granted, if you have never done it before, it can seem overwhelmingly complicated, but trust me, it is not. While there are varying methods and techniques, I wanted to share my current method of madness when it comes to building my arrows in hopes that it will inspire others to want to build their own.
STEP 1 – DETERMINE PROPER ARROW LENGTH
Before you can begin, the first step is to determine the proper length of your arrows so that you can cut the shafts to the correct length. Most newly purchased uncut arrow shafts will range between 31-33” in length. To determine the proper length, draw one of the uncut arrow shafts back in your bow and anchor in your normal position and have someone mark the shaft with a felt marker where it will need to be cut. Now the tricky part. There are many different opinions on where you should mark the shaft. Some people prefer marking it at the front edge of the riser in order to keep the broadhead out in front of the bow hand, while others mark it just in front of the rest which gives them a much shorter arrow. I cut mine approximately 1” in front of the rest. Which method you choose is purely a personal preference. The main consideration to keep in mind when doing so is where you want the broadhead to end up at full draw with the finished arrow
[caption id="attachment_744" align="aligncenter" width="1038"] Everything I need to build a dozen arrows: CX shafts, Bohning Blazers, Double Lock Nocks, Blazer wraps, SSR, Insert Iron, Blazer Bond and a Red Bull.[/caption]
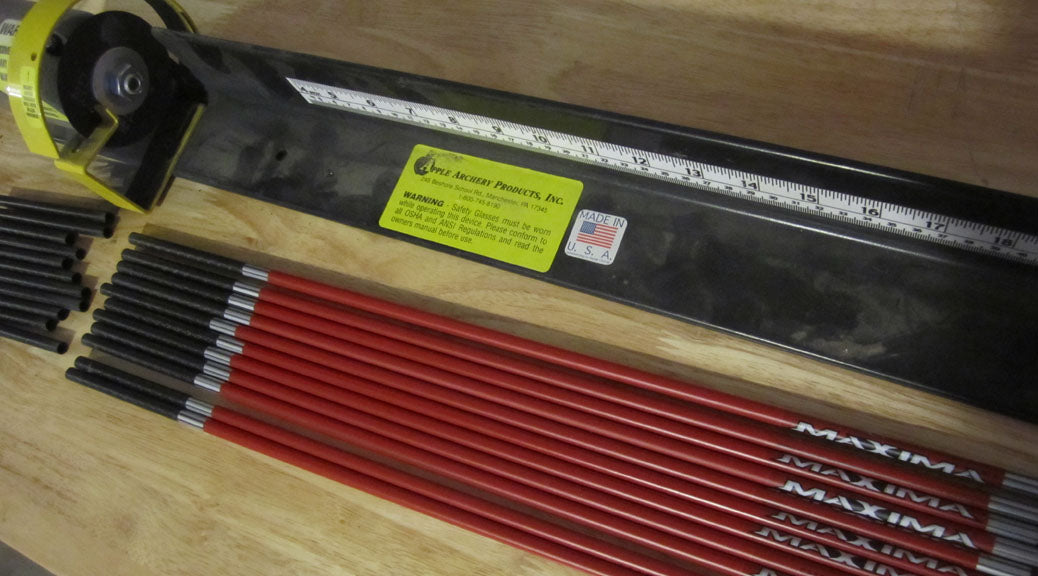
STEP 2 - CUT SHAFTS
Once you have determined the correct length of your arrow, the first step is to cut the shafts to the correct length. I use a high speed cut-off saw made by Apple Archery Products. I roll the shaft slowly into the rotating blade and once cut, rotate it back towards me until it is free of blade. If you don't have access to a saw, I would recommend having a pro shop cut them for you.
Everything I need to build a dozen arrows: CX shafts, Bohning Blazers, Double Lock Nocks, Blazer wraps, SSR, Insert Iron, Blazer Bond and a Red Bull.[/caption]
STEP 2 - CUT SHAFTS
Once you have determined the correct length of your arrow, the first step is to cut the shafts to the correct length. I use a high speed cut-off saw made by Apple Archery Products. I roll the shaft slowly into the rotating blade and once cut, rotate it back towards me until it is free of blade. If you don't have access to a saw, I would recommend having a pro shop cut them for you.
 STEP 3 - SQUARE INSERT END
Use a silver Sharpie to mark the entire end of shaft you just cut on the broadhead end of the shaft. The silver serves as a reference when you are squaring the end of the shaft. Next, use a squaring tool to ensure that the cut end is perfectly square. Keep squaring until all of the silver is gone. This will ensure that the end is perfectly square. You can also repeat this process on the nock end if you prefer.
STEP 3 - SQUARE INSERT END
Use a silver Sharpie to mark the entire end of shaft you just cut on the broadhead end of the shaft. The silver serves as a reference when you are squaring the end of the shaft. Next, use a squaring tool to ensure that the cut end is perfectly square. Keep squaring until all of the silver is gone. This will ensure that the end is perfectly square. You can also repeat this process on the nock end if you prefer.
 STEP 4 - CLEAN SHAFT
The next step is to clean the shaft in preparation for inserts and wraps. On the insert end, dip a Q-Tip into Isopropyl alcohol and swab the inside of the shaft in preparation for the insert. This is a critical step because during the cutting of the shaft, carbon dust accumulates on the inside of the shaft and this area needs to be extremely clean to ensure good adhesion on the inset. Next, mix up 1/2 tsp of Bohning SSR with one pint of hot water and soak the fletching end of the shaft in prep for the wraps. Let soak for 5-7 minutes and then rinse with hot water. Allow to air dry.
STEP 4 - CLEAN SHAFT
The next step is to clean the shaft in preparation for inserts and wraps. On the insert end, dip a Q-Tip into Isopropyl alcohol and swab the inside of the shaft in preparation for the insert. This is a critical step because during the cutting of the shaft, carbon dust accumulates on the inside of the shaft and this area needs to be extremely clean to ensure good adhesion on the inset. Next, mix up 1/2 tsp of Bohning SSR with one pint of hot water and soak the fletching end of the shaft in prep for the wraps. Let soak for 5-7 minutes and then rinse with hot water. Allow to air dry.
 STEP 5 - APPLY INSERTS
Once shafts are completely dry, apply a small drop of Bohning Insert Iron on opposite sides of the insert. Push the insert into shaft while rotating at least one complete turn and then push down on to a hard flat surface until the insert is fully inserted. Wipe away any excessive adhesive with a paper towel.
STEP 5 - APPLY INSERTS
Once shafts are completely dry, apply a small drop of Bohning Insert Iron on opposite sides of the insert. Push the insert into shaft while rotating at least one complete turn and then push down on to a hard flat surface until the insert is fully inserted. Wipe away any excessive adhesive with a paper towel.
 STEP 6 - APPLY ARROW WRAPS
Remove wrap from backing. Place adhesive side up on a soft surface (I prefer a mouse pad) and square against a book or some other square object. Align wrap with edge of book and wrap and roll with steady downward pressure.
STEP 6 - APPLY ARROW WRAPS
Remove wrap from backing. Place adhesive side up on a soft surface (I prefer a mouse pad) and square against a book or some other square object. Align wrap with edge of book and wrap and roll with steady downward pressure.
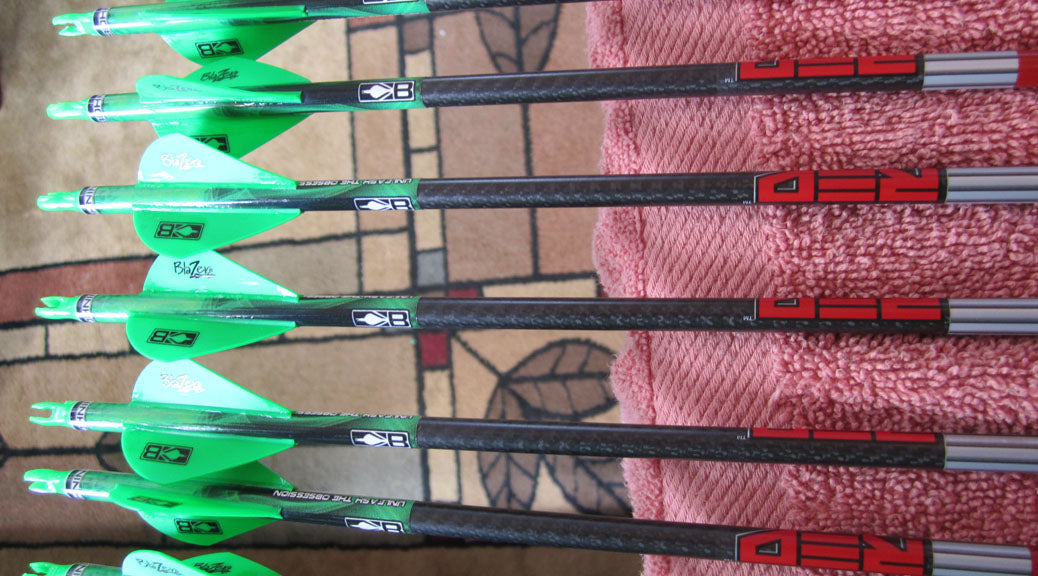
 STEP 7 - VANE INSTALLATION
There are several fletching jigs on the market but I prefer the Bohning Helix Tower fletching jig. It applies all three Blazer vanes at the same time at a 3 degree helical. Stand shaft on the center guide and insert thee Blazer vanes into each of the three slots. Apply a small bead of Bohning Blazer Bond, lift fletching arms, apply tension ring on top of tower, slide lever which positions vanes next to shaft, and slide tension ring down to hold arms tightly. After 10-15 seconds, remove the fletched arrow from jig. If desired, you can apply a small amount of adhesive on the leading and tailing end of each vane to help secure to shaft.
STEP 7 - VANE INSTALLATION
There are several fletching jigs on the market but I prefer the Bohning Helix Tower fletching jig. It applies all three Blazer vanes at the same time at a 3 degree helical. Stand shaft on the center guide and insert thee Blazer vanes into each of the three slots. Apply a small bead of Bohning Blazer Bond, lift fletching arms, apply tension ring on top of tower, slide lever which positions vanes next to shaft, and slide tension ring down to hold arms tightly. After 10-15 seconds, remove the fletched arrow from jig. If desired, you can apply a small amount of adhesive on the leading and tailing end of each vane to help secure to shaft.
 STEP 8 - INSERT NOCK
The final step is to simply install the nock while rotating and applying firm pressure. You will need to rotate the nock with a nock tool until the cock vane is in desired position. If you don't have a nock tool, simply nock each arrow on your string and rotate the shaft until the cock vane is pointing the prefered direction (I prefer facing down) and your arrows are now complete. Allow 72 hours of cure time for adhesives prior to shooting. Enjoy!
STEP 8 - INSERT NOCK
The final step is to simply install the nock while rotating and applying firm pressure. You will need to rotate the nock with a nock tool until the cock vane is in desired position. If you don't have a nock tool, simply nock each arrow on your string and rotate the shaft until the cock vane is pointing the prefered direction (I prefer facing down) and your arrows are now complete. Allow 72 hours of cure time for adhesives prior to shooting. Enjoy!
Everything I need to build a dozen arrows: CX shafts, Bohning Blazers, Double Lock Nocks, Blazer wraps, SSR, Insert Iron, Blazer Bond and a Red Bull.[/caption]
STEP 2 - CUT SHAFTS
Once you have determined the correct length of your arrow, the first step is to cut the shafts to the correct length. I use a high speed cut-off saw made by Apple Archery Products. I roll the shaft slowly into the rotating blade and once cut, rotate it back towards me until it is free of blade. If you don't have access to a saw, I would recommend having a pro shop cut them for you.
STEP 3 - SQUARE INSERT END
Use a silver Sharpie to mark the entire end of shaft you just cut on the broadhead end of the shaft. The silver serves as a reference when you are squaring the end of the shaft. Next, use a squaring tool to ensure that the cut end is perfectly square. Keep squaring until all of the silver is gone. This will ensure that the end is perfectly square. You can also repeat this process on the nock end if you prefer.
STEP 4 - CLEAN SHAFT
The next step is to clean the shaft in preparation for inserts and wraps. On the insert end, dip a Q-Tip into Isopropyl alcohol and swab the inside of the shaft in preparation for the insert. This is a critical step because during the cutting of the shaft, carbon dust accumulates on the inside of the shaft and this area needs to be extremely clean to ensure good adhesion on the inset. Next, mix up 1/2 tsp of Bohning SSR with one pint of hot water and soak the fletching end of the shaft in prep for the wraps. Let soak for 5-7 minutes and then rinse with hot water. Allow to air dry.
STEP 5 - APPLY INSERTS
Once shafts are completely dry, apply a small drop of Bohning Insert Iron on opposite sides of the insert. Push the insert into shaft while rotating at least one complete turn and then push down on to a hard flat surface until the insert is fully inserted. Wipe away any excessive adhesive with a paper towel.
STEP 6 - APPLY ARROW WRAPS
Remove wrap from backing. Place adhesive side up on a soft surface (I prefer a mouse pad) and square against a book or some other square object. Align wrap with edge of book and wrap and roll with steady downward pressure.
STEP 7 - VANE INSTALLATION
There are several fletching jigs on the market but I prefer the Bohning Helix Tower fletching jig. It applies all three Blazer vanes at the same time at a 3 degree helical. Stand shaft on the center guide and insert thee Blazer vanes into each of the three slots. Apply a small bead of Bohning Blazer Bond, lift fletching arms, apply tension ring on top of tower, slide lever which positions vanes next to shaft, and slide tension ring down to hold arms tightly. After 10-15 seconds, remove the fletched arrow from jig. If desired, you can apply a small amount of adhesive on the leading and tailing end of each vane to help secure to shaft.
STEP 8 - INSERT NOCK
The final step is to simply install the nock while rotating and applying firm pressure. You will need to rotate the nock with a nock tool until the cock vane is in desired position. If you don't have a nock tool, simply nock each arrow on your string and rotate the shaft until the cock vane is pointing the prefered direction (I prefer facing down) and your arrows are now complete. Allow 72 hours of cure time for adhesives prior to shooting. Enjoy!


Leave a comment